How To Fix macOS Failed To Personalize The Software Update
Updating to the newest macOS version allows you to enjoy more customization without changing the laptop. That’s great until you receive error messages during the update. Luckily, you are at the right place. Because today we’ll explain how to fix macOS failed to personalize the software update.
Poor internet connection, insufficient storage space, or an old macOS version are the top reasons that cause such errors during an update. However, To fix macOS failed to personalize the software update, try getting a better internet connection and install the update manually by typing commands in the terminal or from the MAC app store.
Don’t kill your excitement for the unlocked features. Just follow the instructions carefully. By the end of this article, you will know several methods to bypass this error.
So, let’s get into it.
Failed To Personalize The Software Update – What Does It Mean?
You have selected the “update now” button. But it’s not working. After a while, you see a message like this “failed to personalize software update.” It means that there was an error during the download process. Now, there are a lot of reasons behind this.
We have explained some major causes down below. Check It out.
Poor connection
Internet connection is the most important factor when it comes to updates. If you are getting messages like “failed to personalize the software update,” check the connectivity.
The whole process, from downloading to installation and restart, is fully dependent on the internet. If the connection is slow or inconsistent, you will notice glitches affecting the process.
Obsolete Computer
You see, updates like macOS Monterey require special configuration in every application. Otherwise, the computer can’t support or read the files. That’s why it is essential to check the compatibility of your computer.
Apple has released a list of MACs that can support and run mac OS Monterey. Check the list thoroughly. If your computer is included, that’s good news.
However, try a lower update if it’s not mentioned in the list. Even if you end up downloading the updated file, it might slow down the system and become inefficient.
Not Enough Storage
It takes around 26 GB of space to upgrade your mac OS Sierra to Monterey. If you have an earlier model, the space requirement will go up to 44 GB. It’s too much. That’s the reason some computers are unable to run new updates.
How To Fix macOS Failed To Personalize The Software Update
By now, you must have understood the factors affecting your macOS update. But that’s not enough. Try to fix it as soon as possible. So, first of all, be sure that your computer’s hardware is actually compatible with the software you want to install. Once you have checked it, follow the methods below.
#1. Check The Internet Connection
To resolve the connectivity issue, ensure you are close to the wi-fi router. It’s important to stay within the wi-fi range. Otherwise, the network won’t be strong enough.
You can check with the service provider to learn about the issue. If the server is down, don’t install the macOS Monterey right now. Try again once the problem has been sorted out.
Sometimes if too many devices are connected to a router, the network quality lowers. In that case, try to use a wired connection for less traffic in your signal.
If you don’t use wi-fi, ensure sufficient data in your package before starting.
#2. Install From MAC APP Store
This method is the easiest way to install a desired update for your macOS. We will show two alternative methods that you can try.
- Go to the top bar on the screen and select the apple logo. Click on the “about this mac” option.
- Select “software update.” And that’s how you can easily see which updates are new. Click on “update” to initiate the process.
However, there are cases where people don’t see any update recommendation under the “software update” option. Don’t worry. You can resolve this issue by using the MAC app store. Here’s how to do it.
- Select the apple logo and check into the “app store.” It’s the same as before. The app store should look like this.
- You can see updates for all the applications and macOS. If you don’t see it, that’s fine. Go to the search bar. And type “mac os.”
- Now, all the new macOS updates will be visible to you. For example, if you are looking for macOS Catalina, click on it. Check the requirements and conditions. If it’s compatible with your computer, click the “download” button.
#3. Use System Preference
Before we jump into the process, it’s better to note down the login password for your MAC. You will need it. Also, the wi-fi connection must be strong. Otherwise, the computer will have trouble downloading the new updated file. Now that you fully know about the precautions, let’s get into it.
- First of all, go to the home screen. On the taskbar, there should be a “system preference” icon. A new update is available if the icon comes with a red dot. So, click on it.
- Next, check into “software update.”
- There you can see the name of the update currently available for you. Tap on the “update now” button beside the label.
- Downloading will take a little while. After that, click on “Continue” to initiate the installation.
- Select “agree” if you are okay with the terms and conditions.
- Choose a specific disk where you want to save the file. Click “Continue” to move on.
- You will have to give your password at this point. After that, your computer will restart automatically.
- You might notice the screen going black. An apple logo with a loading bar will pop up. That’s fine. Just wait a while.
- Now, log into your computer as usual. The process is complete.
#4. Delete & Restart the Download
We have already discussed what happens if you lose connection in the middle of an update. Even worse, you might lose power or turn off the computer. All of these can cause the update file to install partially. To fix this, first of all, delete the file altogether.
Don’t worry. You won’t lose any data as long as you have a backup. Once the data is erased, start the process all over again. You can follow any of the methods we mentioned above.
#5. Type Commands In The Terminal
Don’t worry if the above methods don’t fix this issue. You can manually command the macOS to upgrade.
- For that, open the terminal from the spotlight.
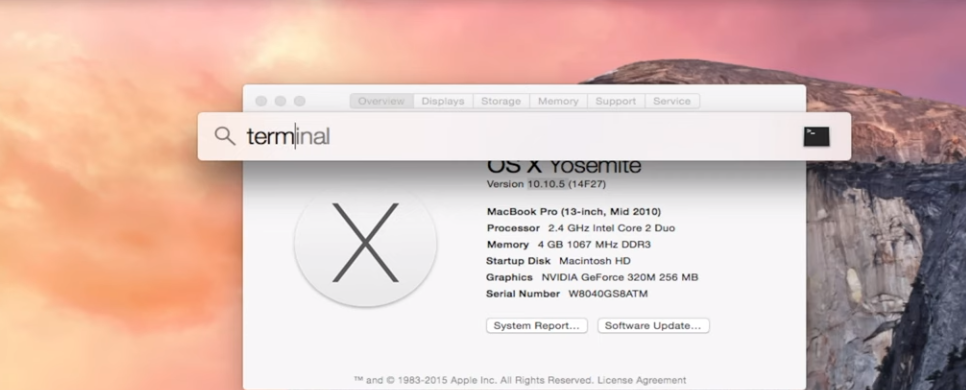
Source: https://youtu.be/Im0RoYQh4ao
- Type the command “software-i-a” to find the latest update available for your macOS. Here “i” stands for install, and “a” stands for all available options.

Source: https://youtu.be/Im0RoYQh4ao
Next, you will have to restart the computer. However, you can simplify the process by typing “sudo sh c-“softwareupdate && reboot.”

Source: https://youtu.be/5cfrn5lfPqQ
#6. Reboot The Device
If your internet connection is okay, try to restart the mac laptop. Most of the time, this simple trick will get rid of any unnecessary glitches. It’s a pretty straightforward method. Let’s check out how to do that.
- Press the power button and don’t release it for five seconds.
- Then, press the “option+command+escape” button at the same time for five seconds again.
- It will force a shutdown in your laptop. Within a few seconds, the laptop will turn on automatically.
Now, try the update process again.
#7. Reinstall macOS From Recovery Mode
This method is fairly simple. You only have to know the right key combination. And, before we start, make sure you have a consistent and powerful internet connection. If you lose connection in the middle of the recovery, it will only increase your hassle. Now, let’s start.
- First of all, turn on the computer. As soon as you do that, it’s time to press a combination of keys. The set of keys can be different depending on what you need. So, take a quick look at what each combination means.
I. Command+R: means you want to use the latest version of macOS installed and running on your device.
II. Option+Command+R: indicates that you want to install the latest version compatible with your macOS.
III. Shift+Command+R: Press it if you want to reinstall the macOS version set by the manufacturers.
- As you can see, the second key combination matches our purpose better. So, press the keys. Keep your hold until you notice a spinning globe/apple logo appear. Then, release the buttons.
- Now, you will see a different interface. Provide your administrator password in the box and click on “next.”
- In this stage, you will see the utility window. The list will include “reinstall macOS.” Click that option.
- Keep following the on-screen instructions. Go with “agree” if you want to install the macOS version.
- You will be notified where the macOS file is being downloaded. If you’re okay with the disk, tap “install.”
- The installation has started. Don’t turn off the computer at this stage. Make sure the internet connection is not interrupted as well.
After that, you can sign into your computer as usual.
Note: It’s better to use a wired keyboard for this process. Don’t forget to plug in the power cord.
We strongly believe following the methods would solve your macOS installation issue. Just be careful. If you still haven’t overcome the problem, don’t hesitate to ask for Apple’s support on this matter.
frequently Asked Questions (FAQs)
We have arrived at our special FAQ section. If you are still curious about the macOS update, you might find some of the answers below. Have a look.
Why Does My MacOS Update Keep Failing?
Such issues also occur if you download a macOS version more than your current version. It requires extra storage space, which might not be available on your computer now. Make sure to check the terms and conditions before clicking the update button
How Do I Manually Update MacOS?
Why Do I See “This Version Of MacOS Can’t Be Installed?”
Apple has announced that the Monterey update would exclude some older mac computers like the MacBook Air and iMac from 2013. You should check the compatibility list before attempting any new updates.
Can I Downgrade The MacOS Version?
Then, press the power button. Follow it up by pressing shift+command+R together. This specific key combination will reinstall the old macOS version that was set in the factory.
Conclusion
Running a macOS update gives you the feeling of a more sophisticated laptop. And the best part is that you don’t have to spend a penny on that. We highly recommend regularly updating your mac laptop operating system for the best experience.
If you face an error during the update process, follow our instructions to resolve the issue. Plus, you should check the firewall settings before following the procedures.
Sometimes, we accidentally turn on the “block any incoming connection” option within the firewall settings. That might explain all the hassles you are going through. So, it’s always better to double-check. And that’s all we had to offer. Hopefully, you liked our brief tutorial.
You Can Also Read: